Ruby on Rails Installation on Windows 7
- Get Ruby and the Development kit from here (this is one click installer) by default you install Ruby and Ruby Gems
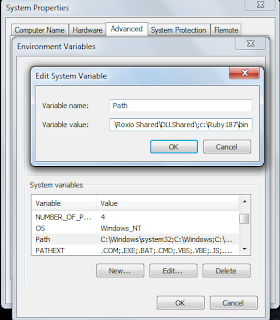
- Next is to set the system environment variable. Quickest way: Open the control panel, search for 'environment', then click 'edit the system environment variables', and add the bin(c:\Ruby 187\bin) after a semicolon to the 'Path' variable.
- Now type ruby -v in cmd prompt, you could see the ruby version installed.
- Our next aim is to install Rails. use gem install rails --include-dependencies. Check your rails version too rails -v. You could see the latest rails version installed.
- Installing Rmagick and ImageMagick. Download the rmagick-win32 package (zip file). Install the gem by going into the directory it’s extracted into and then executing this: gem install rmagick-2.10.0-x86-mswin32.gem
- Then install ImageMagick itself, with the .exe that you just extracted as well.
Getting started with a sample application(in rails 3.0):
- Generate a rails skeleton: rails new testapp
- You’ll see Rails creating plenty of directories and files now. After it’s done, do this:
cd testapp - To start the rails 3.0 server use: rails server

Best aayittunde !!!!
ReplyDeleteHey..this is indeed a very useful and good initiative..Thanks yaar..It helped me a lot..:)
ReplyDeleteThis comment has been removed by the author.
ReplyDeletecomment eyuthan kash kitunundenu ketu ??
ReplyDelete